


turbotog
Well-known member
- Joined
- Nov 27, 2012
- Messages
- 45
- Reaction score
- 0
Hi! You guys and this forum are extremely helpful, so I thought I would start taking some pictures and creating a "how to" on any jobs I end up doing when possible!
Here is a "how to" for removing a driveshaft/Axel from a Renault Twingo GT (should be similar on the 1.2 and RS aswell)
Disclaimer : Please be careful whilst performing any work on a vehicle, they are a heavy item and can very easily cause serious injury or even death.
Make sure the vehicle is parked on a flat level surface and use jack stands and any other nessesary safety all times. Try not to rock the car in any violent motion whilst it is lifted.
If at any time you are unsure of what to do, take it to a professional (or ask on this forum") )
)
1. Whilst the car is parked, ensure the handbrake is on.
2. Remove any centre wheel cap / cover to gain access to the hub nut. (one in the middle of your wheel)
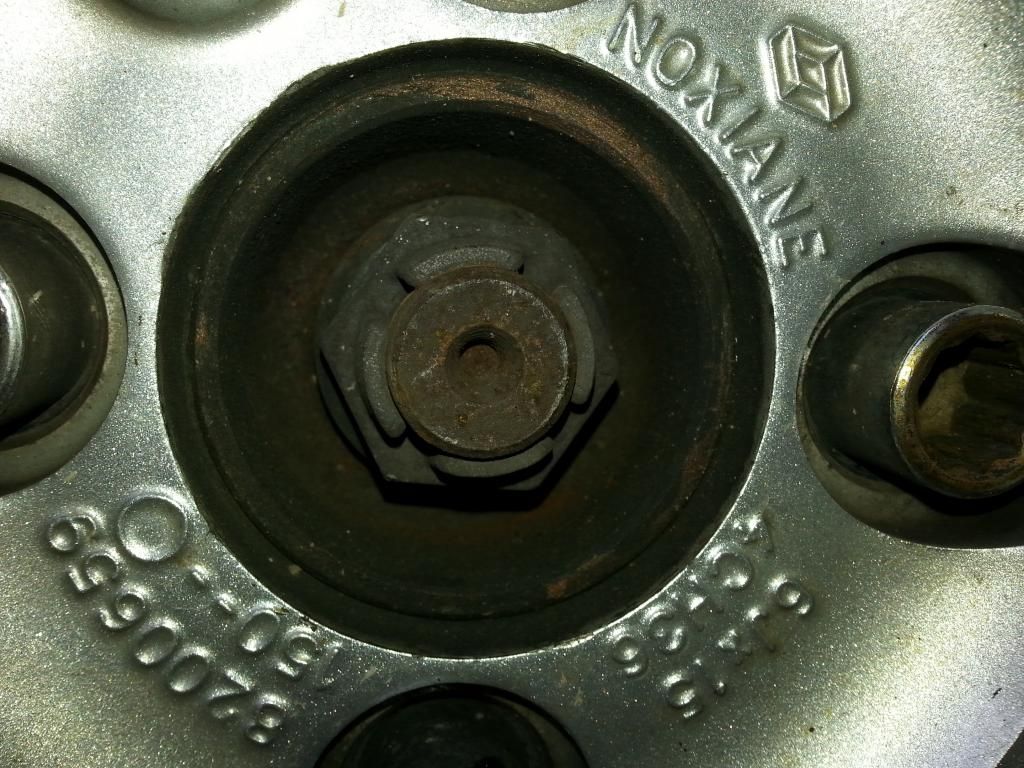
3. Whilst the car is still on the ground, use a 30mm socket to loosen the hub nut.. it will likely require some gentle force to get it going without an impact wrench, I used a 6 ft breaker bar.
Be careful as your socket will likely try to fall off the bolt, so use a jack under the socket to support it. see below:
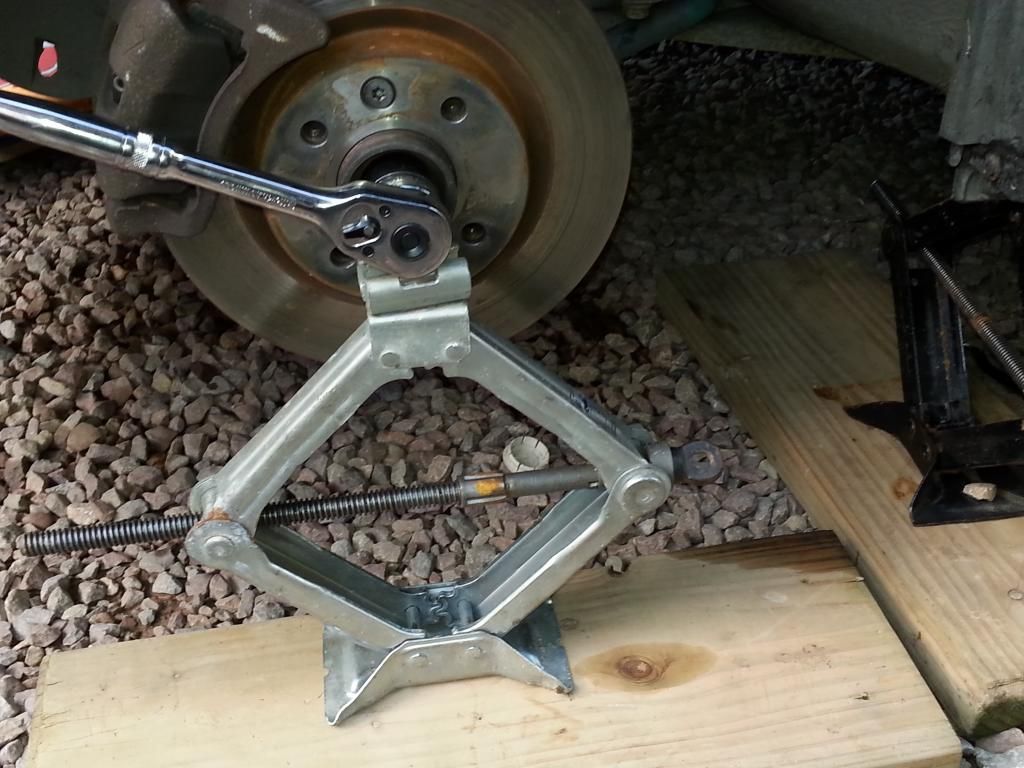
I took this pic after I had jacked up the car because I forgot to take a pic when the car was on the floor. ENSURE THIS BOLT IS LOOSENED FIRST WHILST ON THE GROUND.
4. Loosen the wheel nuts slightly before jacking up the vehicle.
5. Jack up the front of the vehicle - be careful here and follow any safety guidlines in the disclaimer. ensure the vehicle is stable!
6. Remove the wheel bolts and wheel.
7. Fully loosen the hub nut as above (use a screwdriver in between the rotor and caliper to stop it spinning or have a friend hold on the brakes)
8. Using the screwdriver technique above, remove the rotor/disc support screws on the hub x 2 torx - ensure to use the correct sized one, as they round easy!

9. Remove 2 18mm bolts on the back of the caliper. Remove caliper from the rotor and support by cable tie to the spring or carefully rest it on the lower arm ( DO NOT LET IT HANG FROM THE BRAKE CABLE!) you can now also remove the disc brake. (if it is stuck, hit it with a rubber mallet or a hammer (use a piece of wood to strike), hitting side to side, top to bottom)
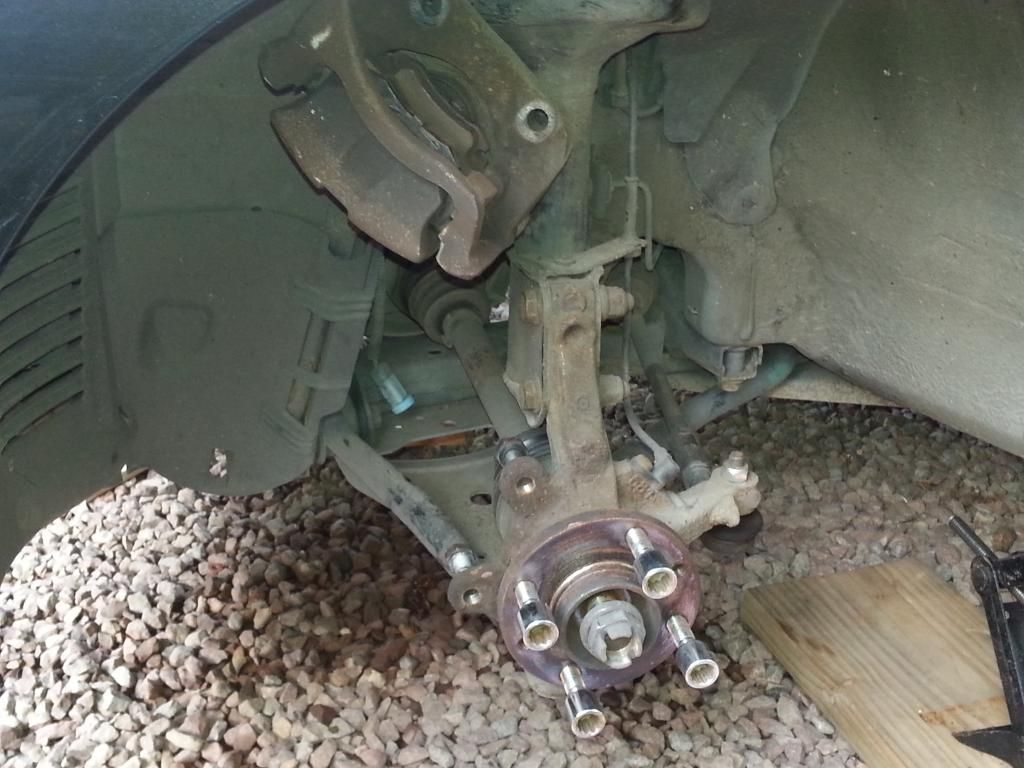
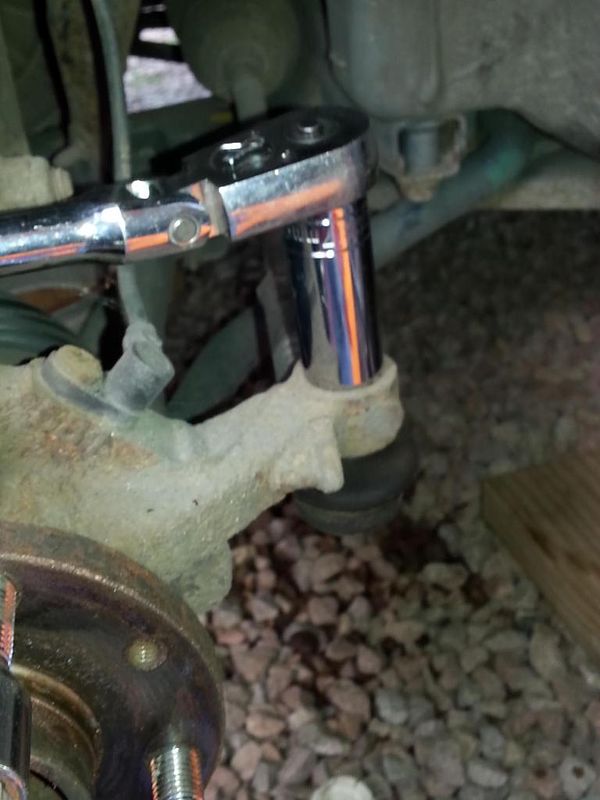
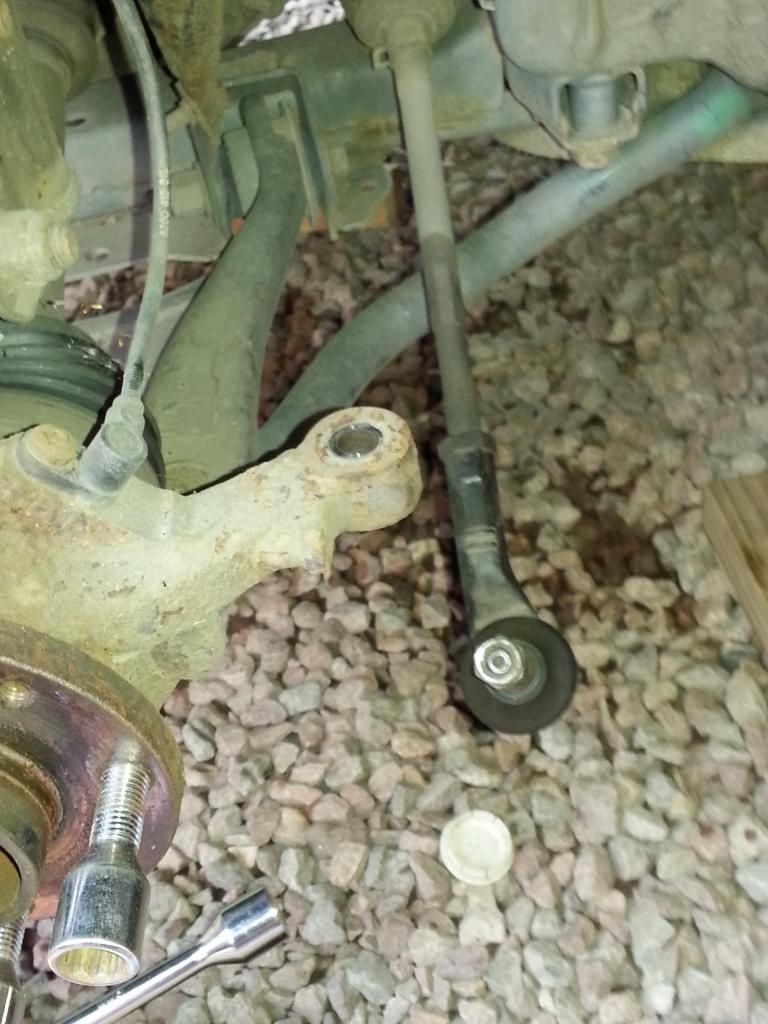
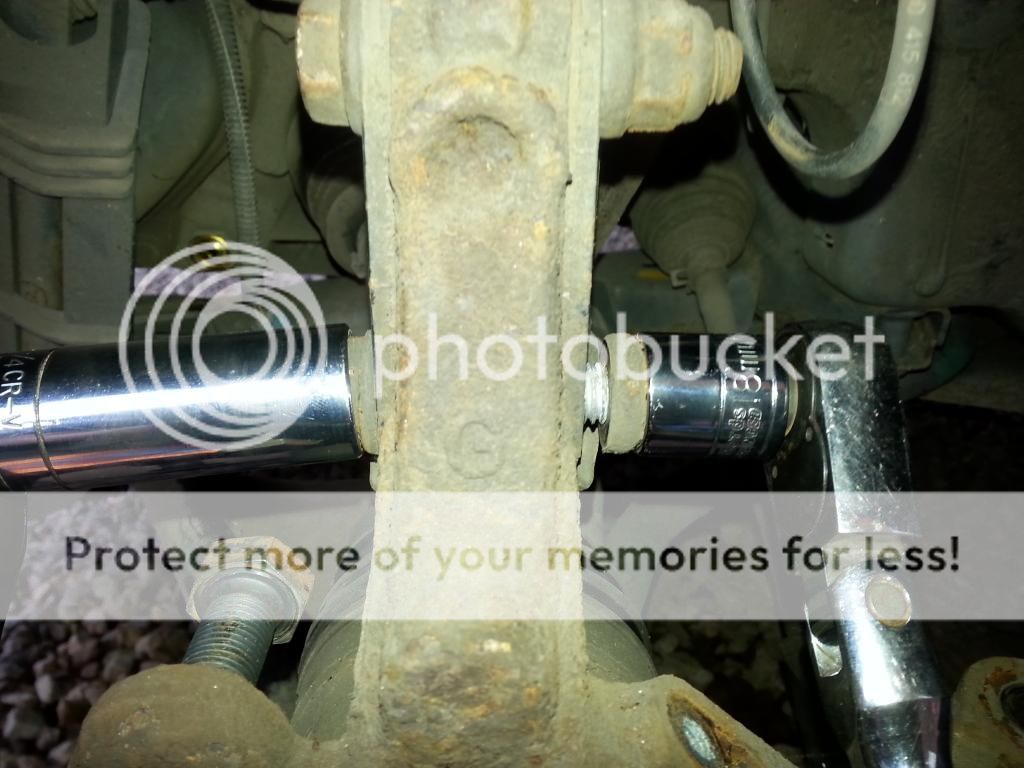
10. Remove tie / track rod end by removing the top nut (17mm).
then a few gentle taps with a peice of wood and a hammer from the top of the bolt should remove it.
11. Remove the ABS sensor. Start by removing the retaining bolt (torx - check fitment as it rounds easily) then use pliers to grip and pull out the sensor. (start by turning it clockwise and anticlockwise, then add an upwards motion - it'll come out!)
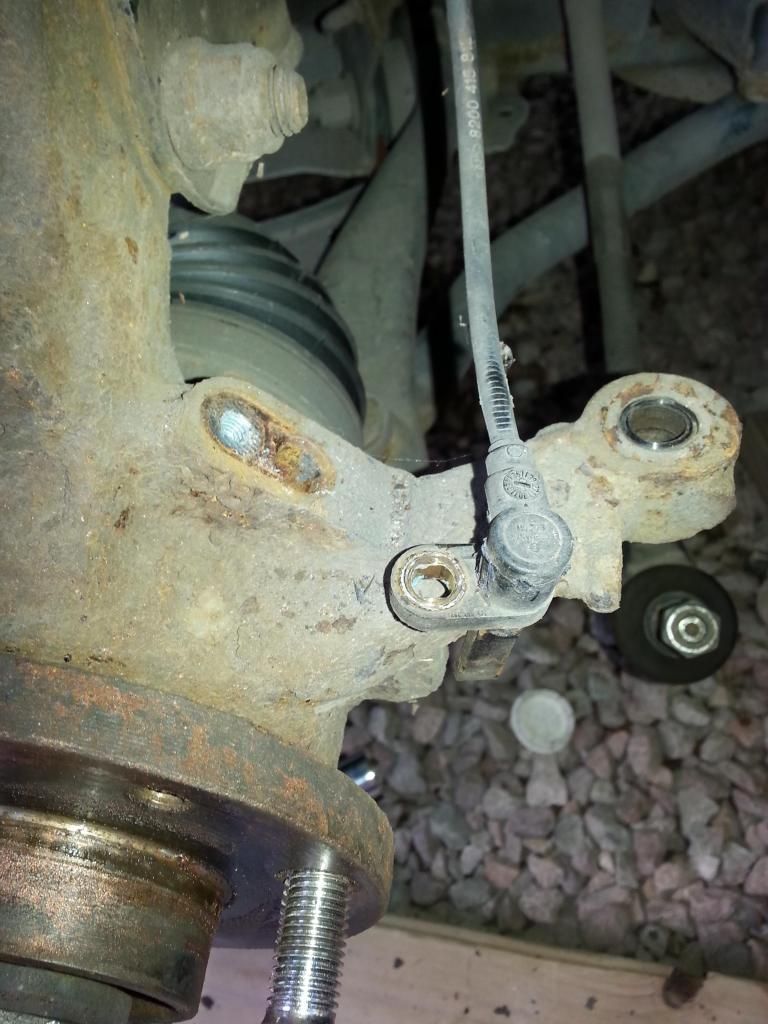
12. Remove the 2 x lower ball joint bolts/nuts where it connects to the lower arm ( easier than popping out out the joint)

13.. Remove the 2 x 18mm bolts from the hub / knuckle to the suspension strut.

14. (ONLY REQUIRED ON THE PASSENGERSIDE /NEARSIDE) Drain gearbox oil using 8mm SQUARE. (the plug closest to nearside/left)
The gearbox has a 2.8 Litre capacity - make sure you have something big enough to catch the oil!
15. (ONLY ON THE DRIVERSIDE / OFFSIDE) under the car about halfway up the driverside driveshaft is a mount that holds a bearing thats built onto the driveshaft and helps support this driveshaft as is it longer. It has 2 bolts that require removing (16mm or 18mm I cant remember) to remove half of the mount. the bolt heads are on the top of the mount.
15. Carefully pull the driveshaft outwards and it should pop straight out.. its best to pull by holding the gearbox side of the inner cv joint by the driveshaft to avoid popping the cv joint.
If it doesn't pull out easily, use a crowbar between the cv joint and gearbox to pry it out (passenger side)
continued..
Here is a "how to" for removing a driveshaft/Axel from a Renault Twingo GT (should be similar on the 1.2 and RS aswell)
Disclaimer : Please be careful whilst performing any work on a vehicle, they are a heavy item and can very easily cause serious injury or even death.
Make sure the vehicle is parked on a flat level surface and use jack stands and any other nessesary safety all times. Try not to rock the car in any violent motion whilst it is lifted.
If at any time you are unsure of what to do, take it to a professional (or ask on this forum
)1. Whilst the car is parked, ensure the handbrake is on.
2. Remove any centre wheel cap / cover to gain access to the hub nut. (one in the middle of your wheel)

3. Whilst the car is still on the ground, use a 30mm socket to loosen the hub nut.. it will likely require some gentle force to get it going without an impact wrench, I used a 6 ft breaker bar.
Be careful as your socket will likely try to fall off the bolt, so use a jack under the socket to support it. see below:

I took this pic after I had jacked up the car because I forgot to take a pic when the car was on the floor. ENSURE THIS BOLT IS LOOSENED FIRST WHILST ON THE GROUND.
4. Loosen the wheel nuts slightly before jacking up the vehicle.
5. Jack up the front of the vehicle - be careful here and follow any safety guidlines in the disclaimer. ensure the vehicle is stable!
6. Remove the wheel bolts and wheel.
7. Fully loosen the hub nut as above (use a screwdriver in between the rotor and caliper to stop it spinning or have a friend hold on the brakes)
8. Using the screwdriver technique above, remove the rotor/disc support screws on the hub x 2 torx - ensure to use the correct sized one, as they round easy!

9. Remove 2 18mm bolts on the back of the caliper. Remove caliper from the rotor and support by cable tie to the spring or carefully rest it on the lower arm ( DO NOT LET IT HANG FROM THE BRAKE CABLE!) you can now also remove the disc brake. (if it is stuck, hit it with a rubber mallet or a hammer (use a piece of wood to strike), hitting side to side, top to bottom)

10. Remove tie / track rod end by removing the top nut (17mm).
then a few gentle taps with a peice of wood and a hammer from the top of the bolt should remove it.


11. Remove the ABS sensor. Start by removing the retaining bolt (torx - check fitment as it rounds easily) then use pliers to grip and pull out the sensor. (start by turning it clockwise and anticlockwise, then add an upwards motion - it'll come out!)

12. Remove the 2 x lower ball joint bolts/nuts where it connects to the lower arm ( easier than popping out out the joint)

13.. Remove the 2 x 18mm bolts from the hub / knuckle to the suspension strut.


14. (ONLY REQUIRED ON THE PASSENGERSIDE /NEARSIDE) Drain gearbox oil using 8mm SQUARE. (the plug closest to nearside/left)
The gearbox has a 2.8 Litre capacity - make sure you have something big enough to catch the oil!
15. (ONLY ON THE DRIVERSIDE / OFFSIDE) under the car about halfway up the driverside driveshaft is a mount that holds a bearing thats built onto the driveshaft and helps support this driveshaft as is it longer. It has 2 bolts that require removing (16mm or 18mm I cant remember) to remove half of the mount. the bolt heads are on the top of the mount.
15. Carefully pull the driveshaft outwards and it should pop straight out.. its best to pull by holding the gearbox side of the inner cv joint by the driveshaft to avoid popping the cv joint.
If it doesn't pull out easily, use a crowbar between the cv joint and gearbox to pry it out (passenger side)
continued..
